
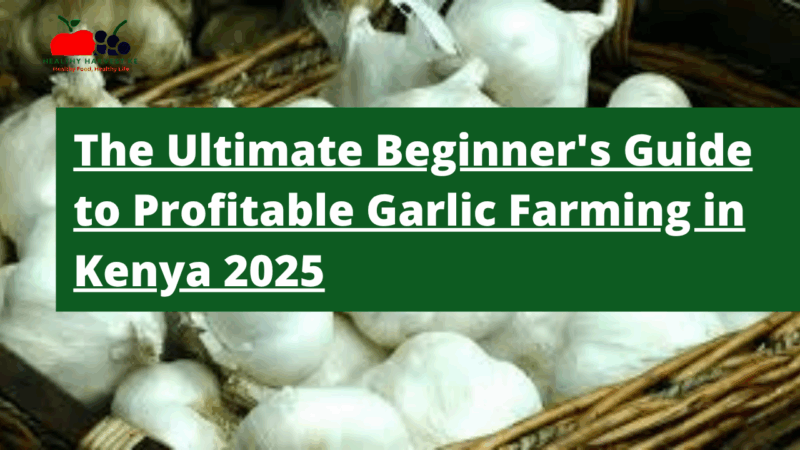
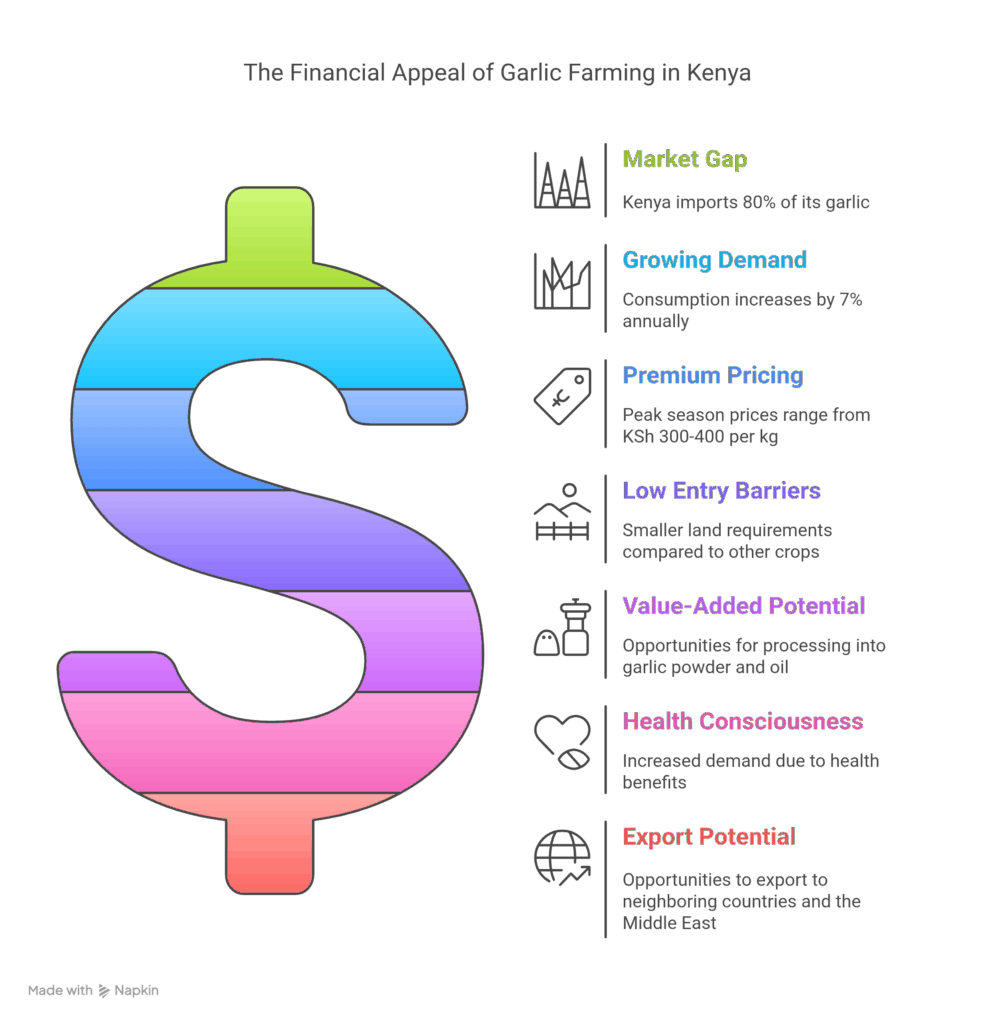
You’ve probably spotted those eye-watering garlic prices at your local market and thought, “Someone’s making good money growing this stuff.” You’re not wrong. With Kenya importing a whopping 80% of its garlic and demand growing by 7% yearly, there’s serious cash to be made in those pungent bulbs.
Let me break it down for you – garlic farming in Kenya isn’t just another agricultural side hustle. It’s a genuine opportunity to tap into an undersupplied market where prices can hit KSh 300-400 per kilogram during peak seasons. And the best part? You don’t need massive land or complicated equipment to get started.
This guide walks you through everything you need to know to turn Kenya’s garlic shortage into your profit engine. We’ll cover the nitty-gritty of getting started, keeping those plants happy, and most importantly – making money from your harvest.
Why Garlic Farming in Kenya Makes Financial Sense
Before you dig in the dirt, let’s talk cash. The numbers behind garlic farming in Kenya tell a compelling story:
- Market gap: Kenya imports about 80% of its garlic, mostly from China and India
- Growing demand: Consumption increases roughly 7% annually
- Premium pricing: Peak season prices range from KSh 300-400 per kilogram
- Low entry barriers: Smaller land requirements compared to many cash crops
- Value-added potential: Processing opportunities like garlic powder and garlic oil
The growing health consciousness among Kenyans has turned garlic from a simple spice into a sought-after health food. Its immune-boosting properties and cardiovascular benefits have expanded the customer base beyond just cooking enthusiasts.
What’s more, the export potential to neighboring countries like Uganda and Tanzania, plus Middle Eastern markets, means you’re not limited to local customers. This diversification helps shield you from localized market fluctuations.
Finding Your Garlic Farming Sweet Spot in Kenya
Not every corner of Kenya will give you premium garlic harvests. The plant has specific preferences when it comes to its growing environment:
Climate and Location Requirements
Garlic thrives in regions with:
- Temperatures between 12-24°C
- Elevations of 500-2000 meters above sea level
- Moderate rainfall patterns
This explains why the most successful garlic farms in Kenya are concentrated in:

- Central Kenya (Nyeri, Kirinyaga, Kiambu)
- Parts of Rift Valley (Nakuru, Bomet)
- Eastern Kenya regions (Embu, Meru)
If you’re not in these areas, don’t stress. Micro-climates exist throughout Kenya, and with proper site selection, you might find your land has the perfect garlic-growing pocket.
Soil Requirements: What Your Garlic Needs to Thrive
Your soil can make or break your garlic farming success. Here’s what to look for:
- Well-drained, fertile soil with good water retention
- pH levels between 5.5-7.0 (near-neutral 6.0-7.0 is ideal)
- Avoid heavy clay or dry sandy soils
Before planting your first clove, invest in a soil test. This small upfront cost saves you from expensive mistakes and helps determine what amendments your soil needs. For around KSh 1,500-2,500, a soil test provides crucial information about your land’s growing potential.
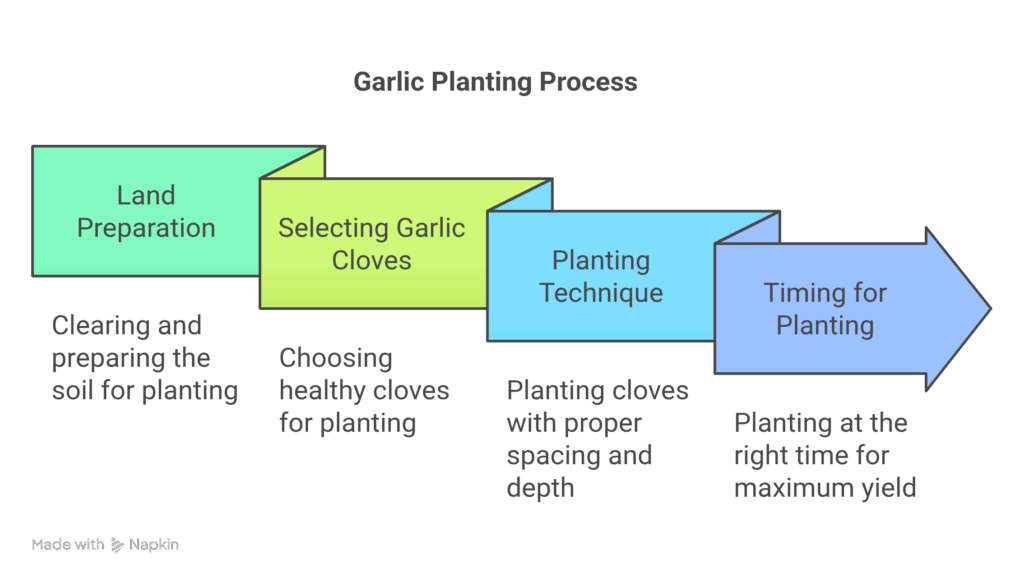
Getting Started: Your Step-by-Step Planting Guide
Ready to get your hands dirty? Let’s walk through the process of turning a simple garlic clove into a profitable crop:
1. Land Preparation: Creating the Perfect Garlic Bed
Garlic needs a well-prepared home to thrive:
- Clear the land of all weeds, bushes, and debris
- Till the soil to a depth of 6-8 inches to ensure good drainage and aeration
- Mix in 3-4 inches of compost or well-rotted manure
- Level the soil surface while maintaining slight elevation for drainage
- Create raised beds if your area receives heavy rainfall
This preparation isn’t just busywork – it directly impacts your yield. Every hour spent preparing your soil can translate to extra kilos at harvest time.
2. Selecting and Preparing Your Garlic Cloves
Not all garlic is created equal, especially when it comes to planting material:
- Source disease-free, locally adapted garlic varieties from reputable suppliers
- Select the largest, healthiest-looking bulbs for planting
- Gently break apart the bulbs, keeping the papery covering on individual cloves
- Set aside the smaller inner cloves for kitchen use – plant only the largest outer cloves
- Handle with care to avoid damaging the flat bottom plate (where roots develop)
Remember: your harvest quality is directly tied to your planting material quality. Don’t cut corners here.
3. Planting Technique: Getting It Right the First Time
The way you place those cloves in the ground matters:
- Dig planting holes approximately 25 cm deep
- Space holes 15 cm apart, with rows 30 cm from each other
- Place cloves with the pointed end facing upward and flat root plate downward
- Plant 1-2 inches deep in warm climates, 3-4 inches in cooler areas
- Cover with soil up to the neck of the clove
- Water thoroughly until soil is evenly moist
4. Timing It Right: When to Plant for Maximum Yields
In Kenya, garlic planting timing depends on your specific region:
- Highland areas: Plant at the onset of the long rains (March-April)
- Mid-altitude regions: Plant during the short rains (October-November)
- For all regions: Aim to plant 2 weeks before or after the typical first frost date in your area
Generally, fall planting (October-November in many Kenyan regions) gives larger heads and bigger harvests because the plants benefit from a natural chilling period.
Mastering Crop Management: Keeping Your Garlic Happy
Getting those cloves in the ground is just the beginning. Now comes the ongoing care that separates mediocre harvests from profitable ones:
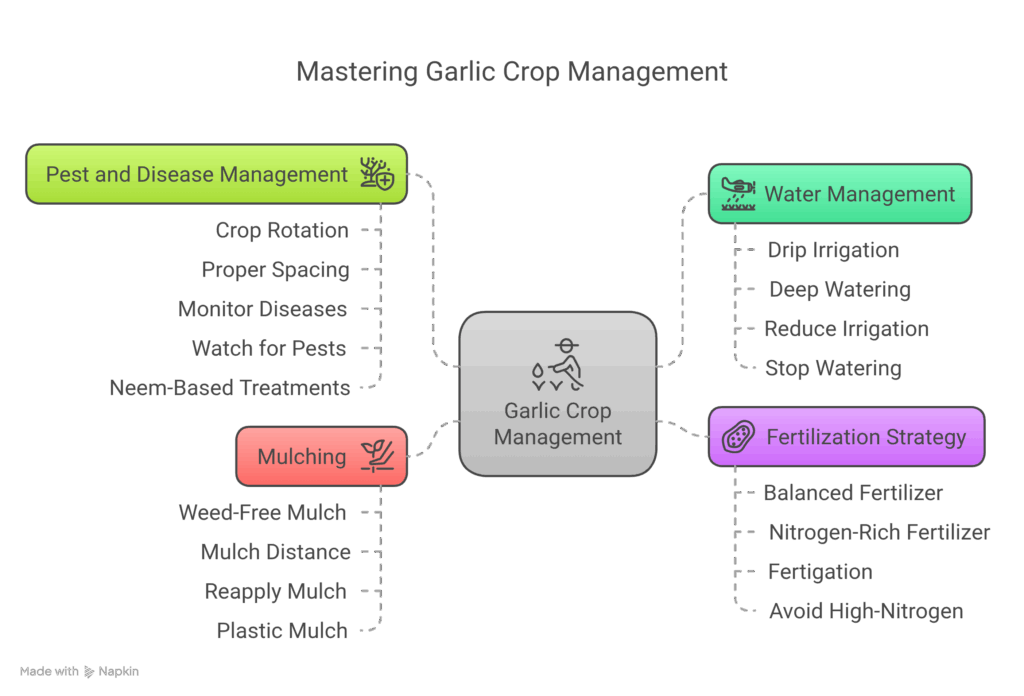
Water Management: Finding the Sweet Spot
Garlic needs consistent moisture, but hates wet feet:
- Install drip irrigation if possible – it’s the most efficient method for garlic
- Water deeply but infrequently to encourage deep root growth
- Reduce irrigation as bulbs mature (when lower leaves begin turning yellow)
- Stop watering completely 2-3 weeks before harvest to allow bulbs to dry properly
Overwatering is the quickest way to invite fungal diseases, so err on the side of slightly drier conditions if you’re unsure.
Feeding Your Garlic: Fertilization Strategy
Your garlic plants need proper nutrition to produce plump, flavorful bulbs:
- Apply balanced fertilizer during initial soil preparation
- Add nitrogen-rich fertilizer 4-6 weeks after planting (when plants are 6-8 inches tall)
- Consider using fertigation (fertilizer + irrigation) for precise nutrient delivery
- Avoid high-nitrogen fertilizers after bulb formation begins to prevent soft bulbs
For organic farmers, well-composted manure and blood meal provide excellent nutrition without chemical inputs.
Mulching: Your Secret Weapon
Don’t skip this step – proper mulching offers multiple benefits:
- Apply a 4-6 inch layer of weed-free mulch like grass clippings, leaves, or straw
- Keep mulch a few centimeters away from plant stems to prevent rot
- Reapply mulch as needed throughout the growing season
- Consider plastic mulch for improved weed suppression in commercial operations
Mulching not only reduces weeding time but also helps maintain consistent soil moisture and temperature – both crucial for garlic development.
Pest and Disease Management: Protecting Your Investment
While garlic naturally repels many pests, it’s not immune to problems:
- Practice crop rotation (don’t plant garlic in the same spot for at least 3 years)
- Ensure proper spacing for good air circulation
- Monitor for signs of fungal diseases, especially after heavy rains
- Watch for specialized pests like garlic weevil (Brachycerus algirus)
- Consider neem-based organic treatments for pest control if needed
Remember that prevention is always easier than cure. Starting with disease-free planting material and maintaining good field hygiene eliminates most pest and disease issues before they start.
Harvesting Your Golden Crop
After months of care, it’s time to reap what you’ve sown. But timing is everything:
When to Harvest
Look for these signs that your garlic is ready:
- Lower leaves are browning while upper leaves remain green
- About one-third of the leaves have turned yellow/brown
- Bulbs feel firm and the individual cloves are plump
- The outer skin of the bulb is papery and dry
In Kenya, this typically happens around 4-5 months after planting, depending on your variety and local conditions.
Harvesting Process
Handle with care to maximize your marketable yield:
- Loosen the soil around bulbs with a garden fork
- Gently pull plants by the stalks, taking care not to bruise the bulbs
- Shake off excess soil but don’t wash the bulbs
- Keep the leaves and roots attached for the curing process
- Handle gently – bruised garlic doesn’t store well
Post-Harvest Handling: Where Value Is Made or Lost
What you do after harvest dramatically impacts your profit margin:
Curing Your Garlic Properly
Proper curing is essential for flavor development and storage life:
- Hang or lay harvested bulbs in a warm, dry, well-ventilated area
- Keep out of direct sunlight to prevent deterioration
- Allow 2-3 weeks for proper curing
- Once outer layers are papery and roots are dry, trim roots to 1/4 inch
- Cut tops to 1-2 inches above the bulb (or leave attached for braiding)
Storage Conditions for Maximum Shelf Life
To maintain quality and extend marketability:
- Store in a cool, dry place with 60-70% relative humidity
- Use breathable storage containers like brown paper bags, baskets, or mesh bags
- Avoid plastic bags or refrigeration, which promote sprouting and rot
- Check regularly and remove any damaged bulbs immediately
- When stored properly, garlic can maintain quality for 6-8 months
Turning Harvest into Profit: Marketing Strategies
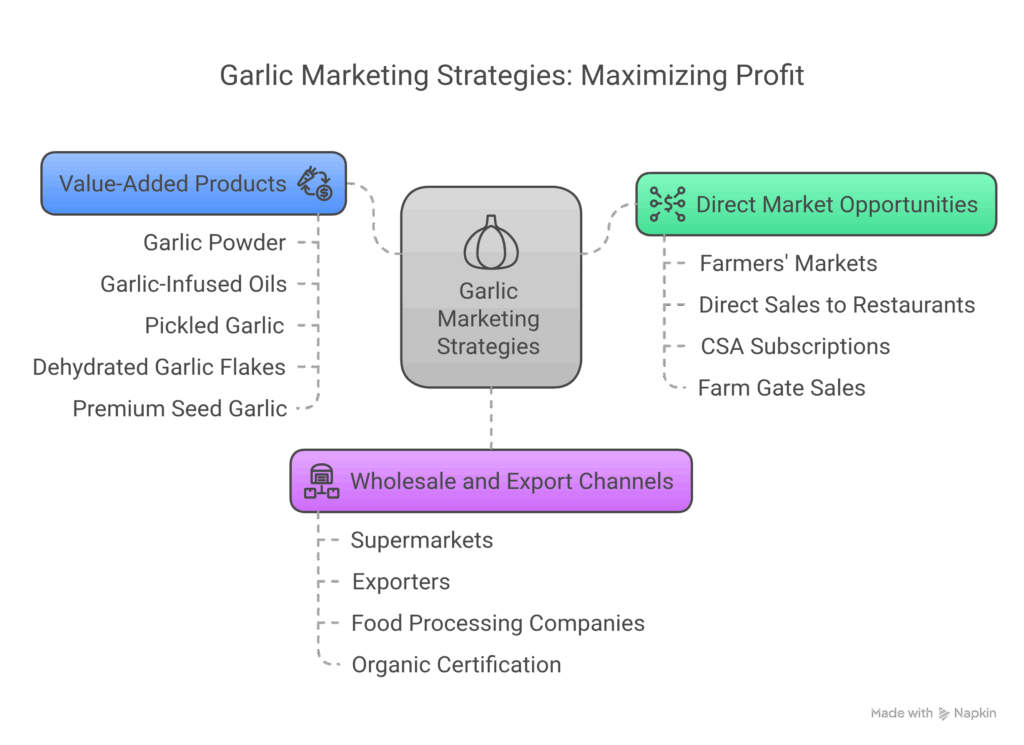
Growing great garlic is only half the equation – now you need to sell it:
Direct Market Opportunities
Cut out the middleman and keep more profit:
- Local farmers’ markets where health-conscious consumers shop
- Direct sales to restaurants and hotels
- Community Supported Agriculture (CSA) subscriptions
- Farm gate sales with roadside signage
Wholesale and Export Channels
For larger operations:
- Supply to supermarkets and grocery chains
- Connect with exporters serving Uganda, Tanzania, and Middle Eastern markets
- Partner with food processing companies
- Explore organic certification for premium pricing
Value-Added Products
Transform your crop into higher-margin products:
- Garlic powder
- Garlic-infused oils
- Pickled garlic
- Dehydrated garlic flakes
- Premium seed garlic for other farmers
By diversifying your sales channels and product offerings, you protect yourself from market volatility and maximize returns from each harvest.
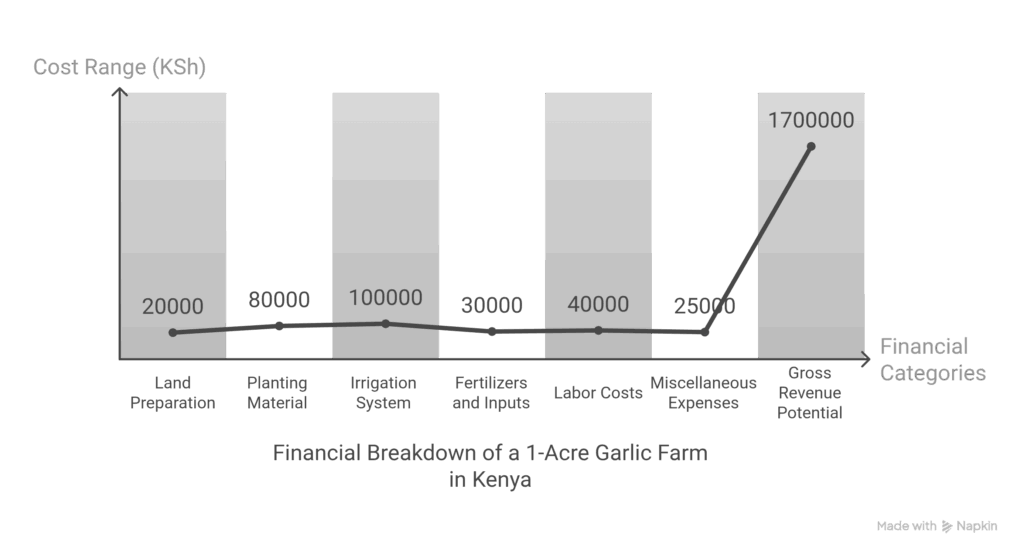
Financial Breakdown: What to Expect
Let’s talk real numbers for a 1-acre garlic farm in Kenya:
Initial Investment (Rough Estimates)
- Land preparation: KSh 15,000-25,000
- Planting material: KSh 60,000-100,000 (depending on variety and source)
- Irrigation system: KSh 50,000-150,000 (depending on system type)
- Fertilizers and inputs: KSh 20,000-40,000
- Labor costs: KSh 30,000-50,000
- Miscellaneous expenses: KSh 20,000-30,000
Total estimated startup cost: KSh 195,000-395,000 per acre
Potential Returns
- Average yield: 4,000-6,000 kg per acre
- Market price range: KSh 250-400 per kg
- Gross revenue potential: KSh 1,000,000-2,400,000
Even accounting for additional harvesting and marketing costs, the profit potential is significant, with many farmers reporting ROI of 100-200% in a single growing season.
Success Stories: Real Kenyan Garlic Farmers
James from Nyeri County started with just a quarter acre three years ago. Today, he manages two acres of garlic production and has established a small processing facility for garlic powder. “The key was focusing on quality from day one,” he explains. “Kenyan consumers can taste the difference between fresh local garlic and imported products.”
Sarah in Nakuru began garlic farming after losing her corporate job. Using intensive planting methods on just half an acre, she now supplies five high-end restaurants in Nairobi. “Restaurant chefs pay premium prices for freshly harvested local garlic,” she notes. “The flavor is simply superior to imports that have been stored for months.”
Common Mistakes to Avoid
Learn from others’ errors to fast-track your success:
- Starting too big before mastering the techniques
- Skimping on planting material quality
- Inadequate soil preparation
- Improper watering (usually overwatering)
- Harvesting too early or too late
- Poor curing techniques
- Ignoring crop rotation principles
- Neglecting proper storage conditions
- Failing to plan your market strategy before harvest
Resources for Kenyan Garlic Farmers
Build your knowledge network:
- Kenya Agricultural and Livestock Research Organization (KALRO) for technical support
- County agricultural extension offices for localized advice
- Horticultural Crops Directorate for export requirements
- Local farmers’ cooperatives for collective marketing power
Ready to Get Started?
Garlic farming in Kenya represents an excellent opportunity for motivated beginners with reasonable startup capital. The combination of growing domestic demand, significant import replacement potential, and increasing health consciousness creates a favorable market environment.
Remember that success comes from attention to detail at every stage—from site selection and soil preparation to proper harvest timing and strategic marketing. Start small, learn the ropes, and scale gradually as you master the techniques.
Unlike many agricultural ventures that require massive land or complicated machinery, garlic farming rewards careful technique more than scale or equipment. Your personal touch, consistency, and quality focus will set your garlic apart in the marketplace.
What questions do you have about starting your garlic farming journey? Drop them in the comments below, and let’s grow together!
This guide was developed based on extensive research and consultation with practicing garlic farmers across Kenya’s main growing regions. While we strive for accuracy, local conditions vary, and we recommend connecting with your county agricultural extension officer for advice specific to your area.